October 28, 2026
Field Coordination: A Practical Guide to Renovating Existing Buildings
In an occupied building, the drawings rarely tell the whole story. Existing systems, hidden conditions, and equipment requirements can create conflicts that lead to costly rework and delays if they aren’t identified before construction begins.
While 3D building scans and Building Information Modeling (BIM) can be valuable tools for documenting existing conditions and coordinating complex systems, not every project requires extensive 3D coordination. On smaller lab renovations and fast-track projects, we’ve found that disciplined 2D coordination, confirmed in the field, is often a practical and effective way to protect an owner’s budget and schedule.
At Siena, we approach field coordination as a collaborative process that brings drawings, equipment requirements, and existing conditions together before the first trade mobilizes. The goal is straightforward: identify potential conflicts early, resolve them with the design team, and give everyone a clear, coordinated plan to build from. Here’s how we do it.
A Step-by-Step Guide to Effective Field Coordination
- Coordinate before you build, not after. Identify conflicts early, propose adjustments, and obtain the necessary design-team approvals before work proceeds.
The earlier a conflict is identified, the easier and less expensive it is to resolve. Reviewing drawings, equipment specifications, and existing conditions together helps the team catch misalignments before installation, when a conversation and a drawing revision can prevent a costly change order.
Example – A lab bench connection that doesn’t line up with its designated utility location may require only a minor adjustment on paper. Once rough-in work is complete, the same discrepancy could mean reworking installed piping or electrical connections.
2. Get everyone working from the same information. Establish one coordinated picture of the work so everyone can build from the same information.
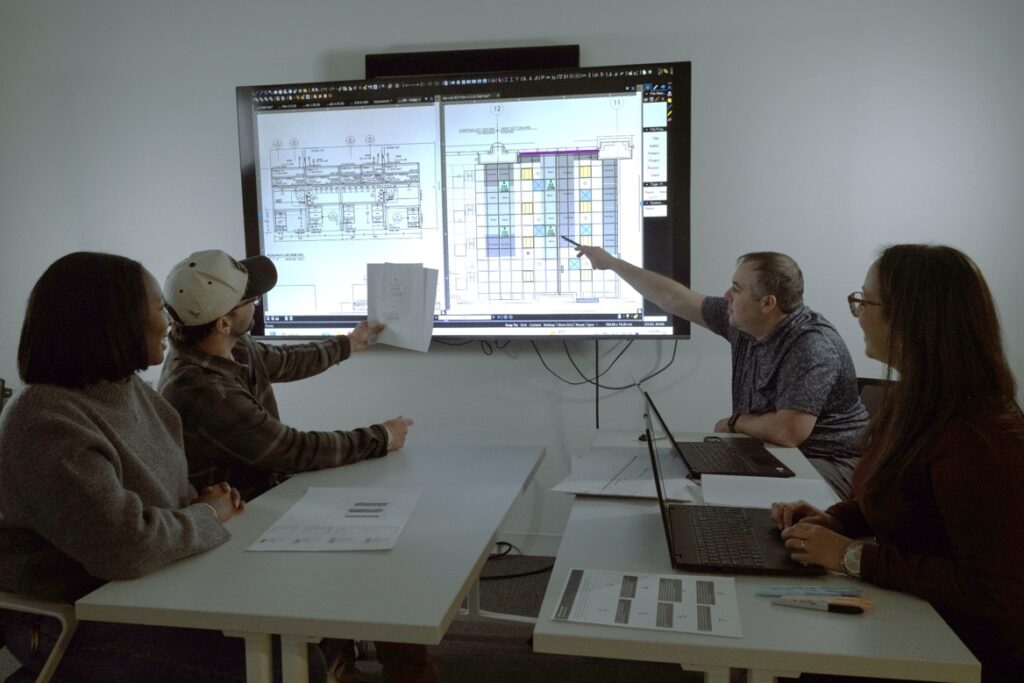
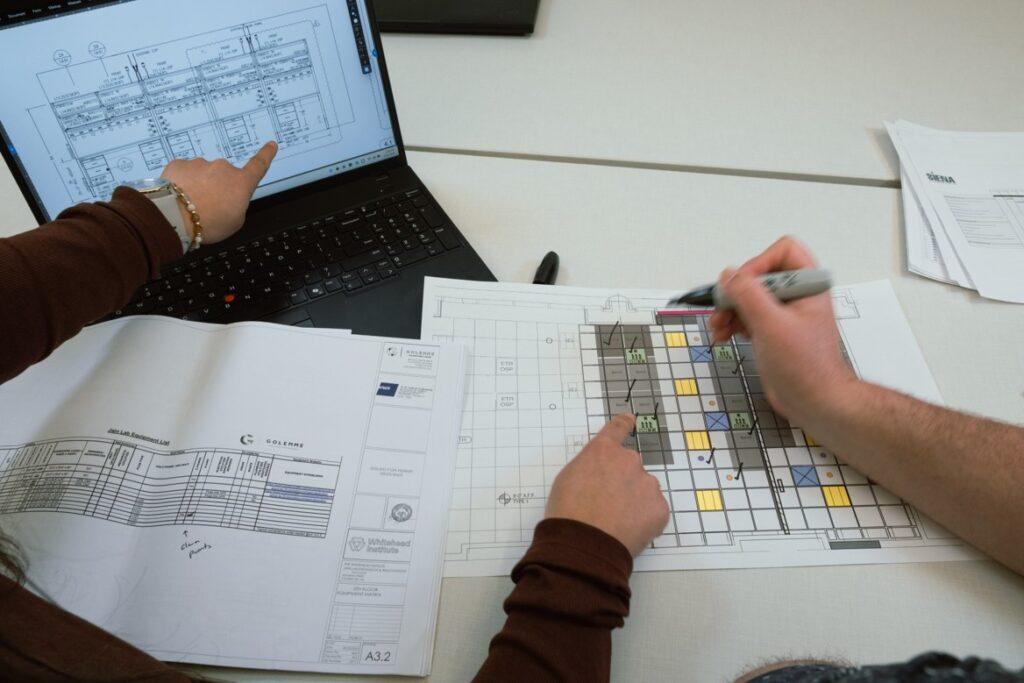
Architectural drawings, mechanical and electrical plans, equipment schedules, and casework shop drawings often contain related information in separate places. Without a coordinated reference, individual trades may be working from different assumptions. Bringing these documents together into a single coordinated plan helps establish a common understanding of where equipment, utilities, and building systems need to go.
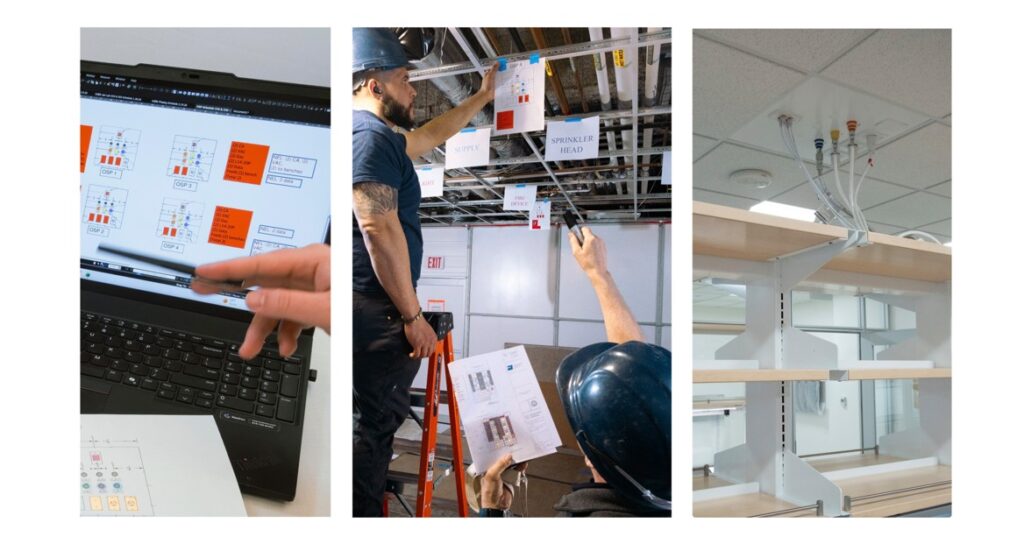
Example – In lab renovations, this may include an Owner Supplied Piping (OSP) schedule and a coordinated Reflected Ceiling Plan (RCP). An OSP schedule identifies the locations and requirements for owner-supplied piping connections, while an RCP shows the ceiling layout from below, including lighting, sprinklers, diffusers, and other ceiling-mounted elements.
Cross-referencing these documents helps ensure that the work of one trade aligns with the requirements of the others.
- Confirm what is actually being installed. Verify actual equipment requirements and connection types rather than assuming the drawings tell the whole story.
Equipment specifications matter just as much as the drawings. Manufacturer cut sheets and installation requirements can reveal details that affect the location and type of utility connections, including power, plumbing, and specialty gases.
Example – An electrical connection shown as a standard receptacle may actually require a twist-lock connection. A bench may also have left-hand and right-hand configurations, each with different utility connection locations. If those details aren’t reconciled with the plans and equipment schedule, the connections may not align with the installed equipment.
Checking these requirements before rough-in allows the team to confirm that the design accommodates the equipment being purchased and installed.
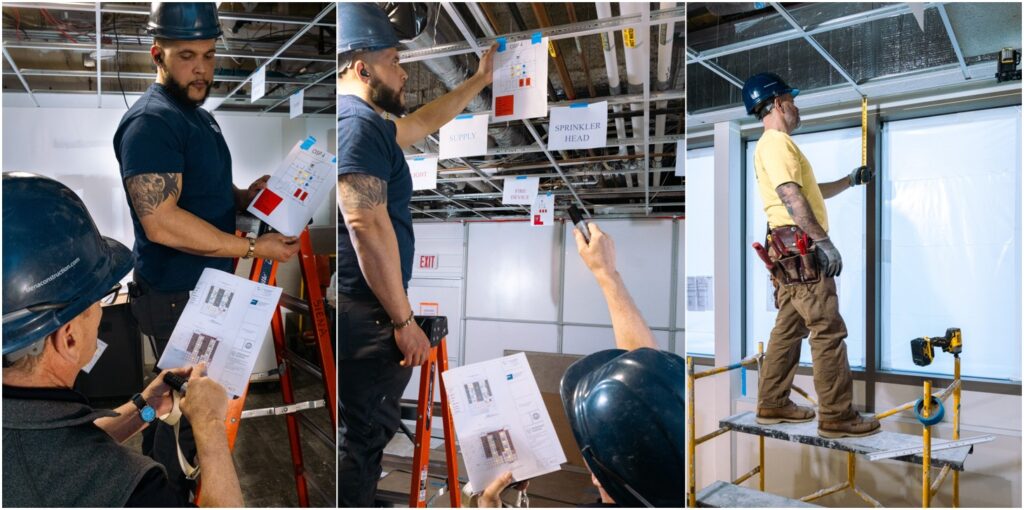
- Coordinate the ceiling before it goes in. Treat the ceiling as a coordinated system, not a collection of separate installations.
Ceilings are often among the most crowded areas of an existing building. Sprinkler heads, fire alarm devices, diffusers, light fixtures, occupancy sensors, exit signs, emergency showers, and utility connections all compete for limited space.
A coordinated RCP helps the team identify conflicts before installation begins. Establishing a confirmed starting point for the acoustical ceiling tile (ACT) grid also helps align ceiling elements and avoid awkward field adjustments.
Example – Where tight clearances create additional constraints, the team may need to make coordinated changes to device locations. Bringing those proposed adjustments to the design team for review and approval keeps the process documented and prevents individual trades from improvising their own solutions in the field.
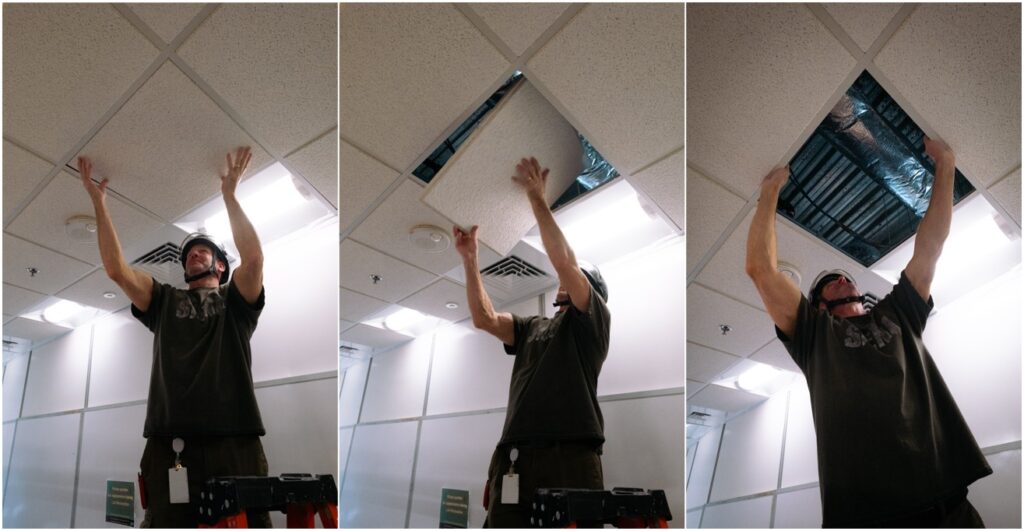
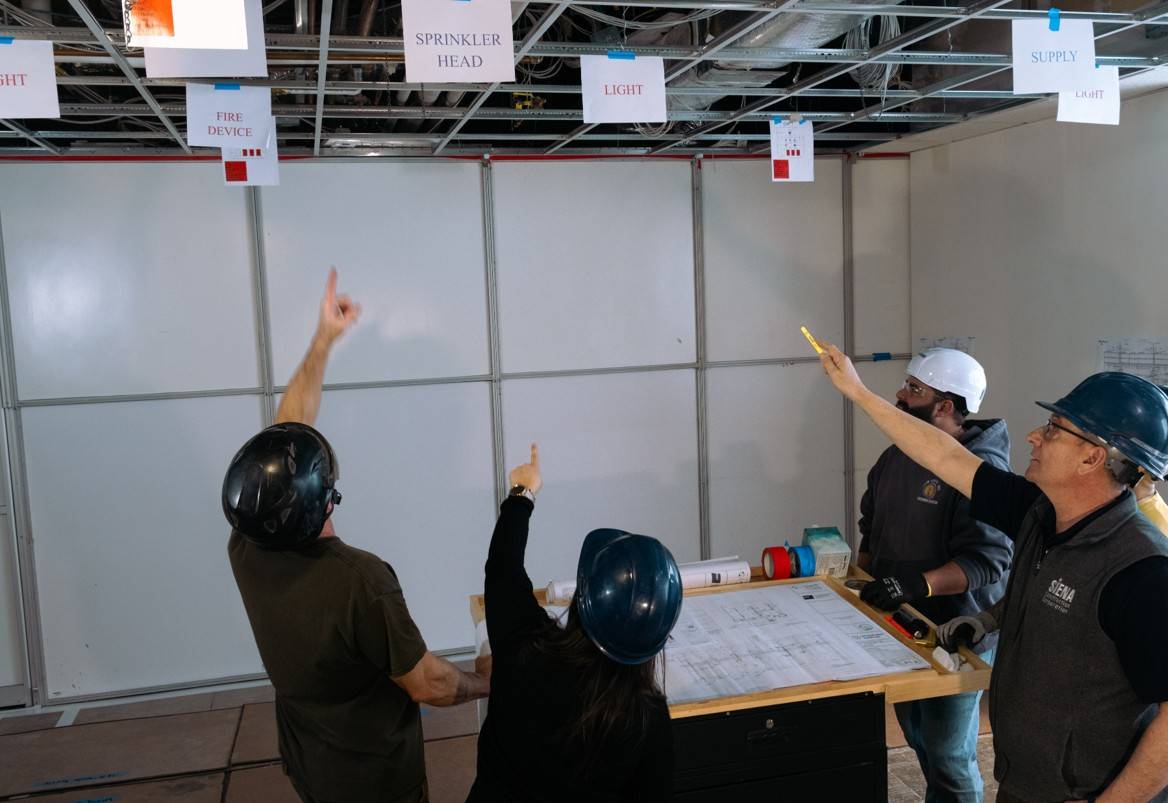
- Look above the ceiling before committing to a plan. Use field observation to validate assumptions and identify hidden risks before they affect installation.
Existing conditions aren’t always fully documented, particularly in occupied buildings that have undergone multiple renovations. Drawings and building scans can help, but they may not reveal every obstruction or discrepancy.
Example – Selectively removing ACT ceiling tiles allows the team to inspect conditions directly, identify potential conflicts, and evaluate alternatives before committing to a construction approach. When time and site conditions permit, removing additional tiles and laying out proposed systems on the floor can help visualize how different elements will fit together.
This hands-on investigation is especially useful when new work must connect to existing utilities or fit within a limited ceiling space.
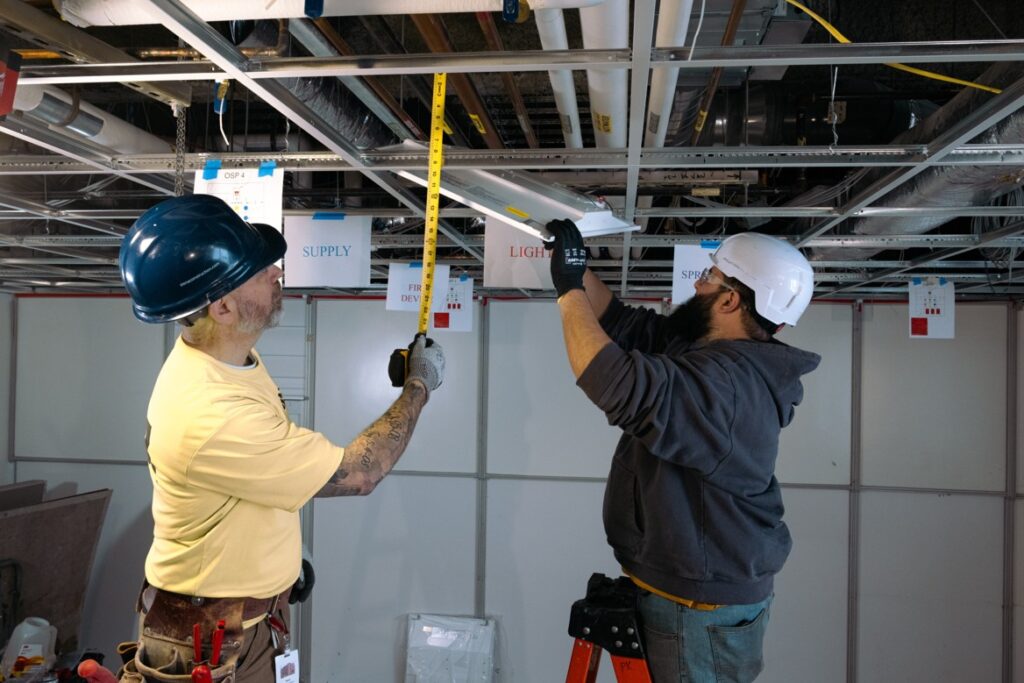
- Verify that the drawings match the space. Confirm critical dimensions and existing conditions in the field instead of relying on the drawings alone.
Before construction begins, the team should measure existing conditions within the project area and compare them with the contract documents. This confirms whether existing infrastructure is where the drawings indicate and whether it can accommodate the proposed work.
Example – existing piping, ductwork, or other systems designated to remain may sit lower than anticipated, leaving insufficient clearance for the proposed ceiling or new equipment. Identifying that discrepancy before installation gives the design team an opportunity to evaluate alternatives.
This step is particularly important in renovations, where the project team must work around existing infrastructure rather than starting with a clean slate.
- Plan for maintenance, not just installation. Consider how the finished space will be operated and serviced, not just how it will be built.
A system that fits during construction isn’t necessarily a system that can be maintained easily afterward. Equipment and building components need sufficient clearance for routine servicing and eventual replacement.
Example – Checking details such as light fixture back-box depths, HVAC filter removal clearances, and valve operating space helps ensure that maintenance staff can access the systems once the space is occupied.
These requirements are easy to overlook when the focus is solely on fitting everything into a confined area. Addressing them during coordination helps deliver a space that works over the long term, not just on opening day.
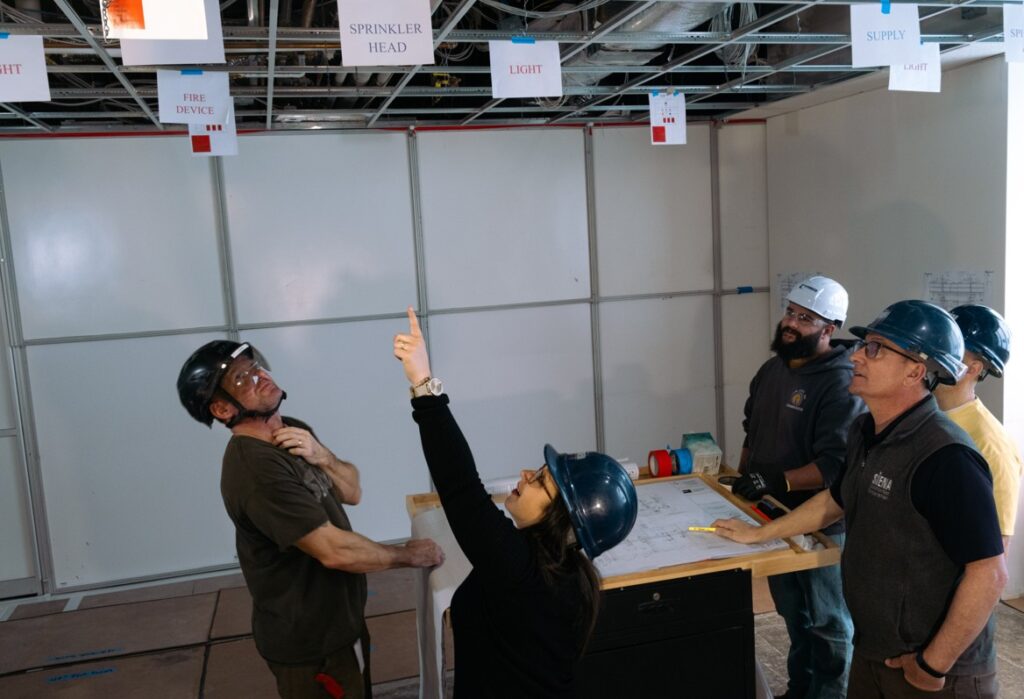
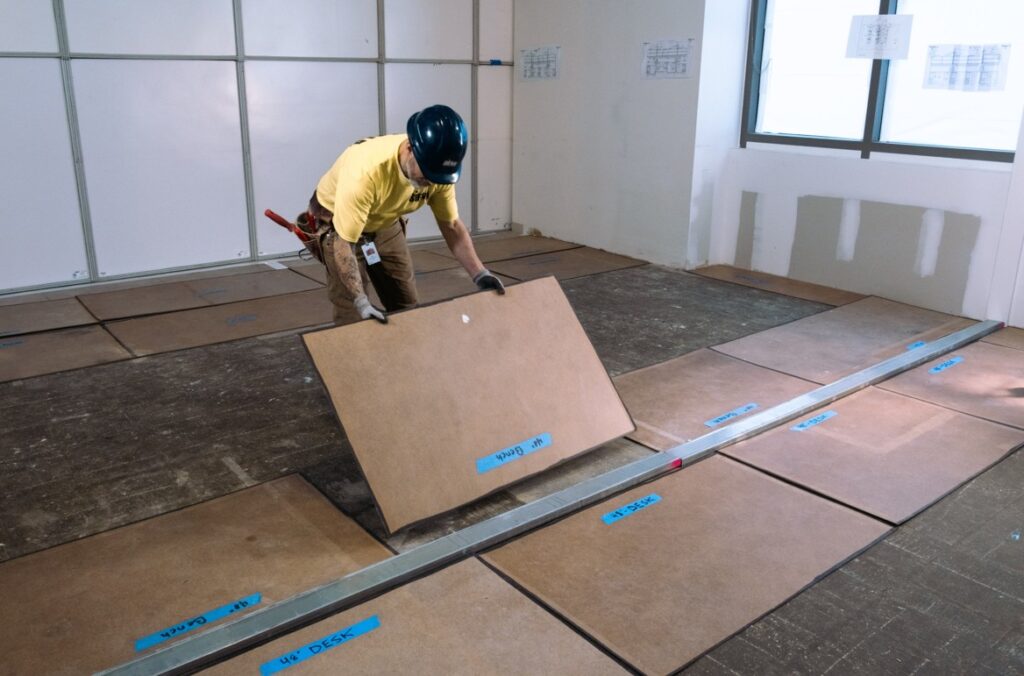
- Let the owner and design team see it before it’s built. Use simple, visual tools to validate the design with the people who will use and maintain the space.
Drawings communicate dimensions and technical requirements, but physical layouts can make spatial relationships and workflow issues easier to understand.
For lab renovations, laying out casework and equipment locations on the floor with blue tape, preparing bench elevations, and reviewing mock-ups with the owner and design team can help stakeholders evaluate the proposed arrangement before installation.
These reviews may reveal that equipment needs to shift, a connection is inconveniently located, or a layout doesn’t support the intended workflow. Resolving those issues before construction is complete gives the team greater flexibility and helps avoid expensive corrections later.
Why Field Coordination Matters to the Owner
Disciplined field coordination helps protect an owner’s investment by addressing potential problems while they are still relatively easy to solve.
Less rework. Identifying conflicts before installation reduces the need to remove, relocate, or reinstall completed work.
Fewer unexpected costs. Early, documented coordination helps limit avoidable change orders and the associated labor and material expenses.
A more reliable schedule. Resolving questions before trades arrive helps prevent installation stoppages and delays. In laboratory environments, where construction milestones may be tied to research timelines and funding, that predictability is particularly important.
A more functional end product. Verifying equipment connections, clearances, and system locations helps ensure the finished space performs and can be maintained effectively.
A practical, cost-conscious approach. For projects that don’t require extensive 3D modeling, field coordination relies on a disciplined process, experienced field judgment, and clear communication rather than additional scanning and modeling technology.
Choosing the Right Coordination Approach
The right level of coordination depends on the project’s complexity, schedule, and existing conditions. Field coordination is particularly effective for:
Fast-track projects. When schedules are measured in weeks, focused 2D coordination can resolve conflicts without the additional time required for comprehensive 3D modeling.
Smaller, well-defined scopes. Projects involving fewer trades within a contained area may not require extensive BIM coordination.
Typical lab turnovers. When a lab is reconfigured for a new principal investigator (PI), major systems and utilities often remain in place. Field verification helps ensure new casework, equipment, and utility connections fit existing conditions.
These principles also apply to office renovations and other existing-building projects. Larger, more complex projects – new construction, vivarium, or cleanrooms with densely coordinated systems – may benefit from the added visualization and clash detection that BIM provides.
At Siena, we match the coordination method to the project’s specific risks and requirements. By combining document review, field verification, and collaboration with the owner and design team, we help reduce uncertainty, prevent costly surprises, and protect the project’s budget and schedule.